
This guide aims to show you how to open, manage and rent a Connext state channel, i.e., a state channel supporting Ethereum Virtual Machine (EVM) funds. If you haven’t downloaded and configured your version of the Hydranet DEX yet, refer to this guide on how to proceed. Also, to follow this guide you will need native tokens to pay for network fees. If you, for instance, are planning on opening a Connext state channel on the Artbitrum network, make sure to deposit some aETH to your wallet before proceeding with this guide.
Open a Connext state channel
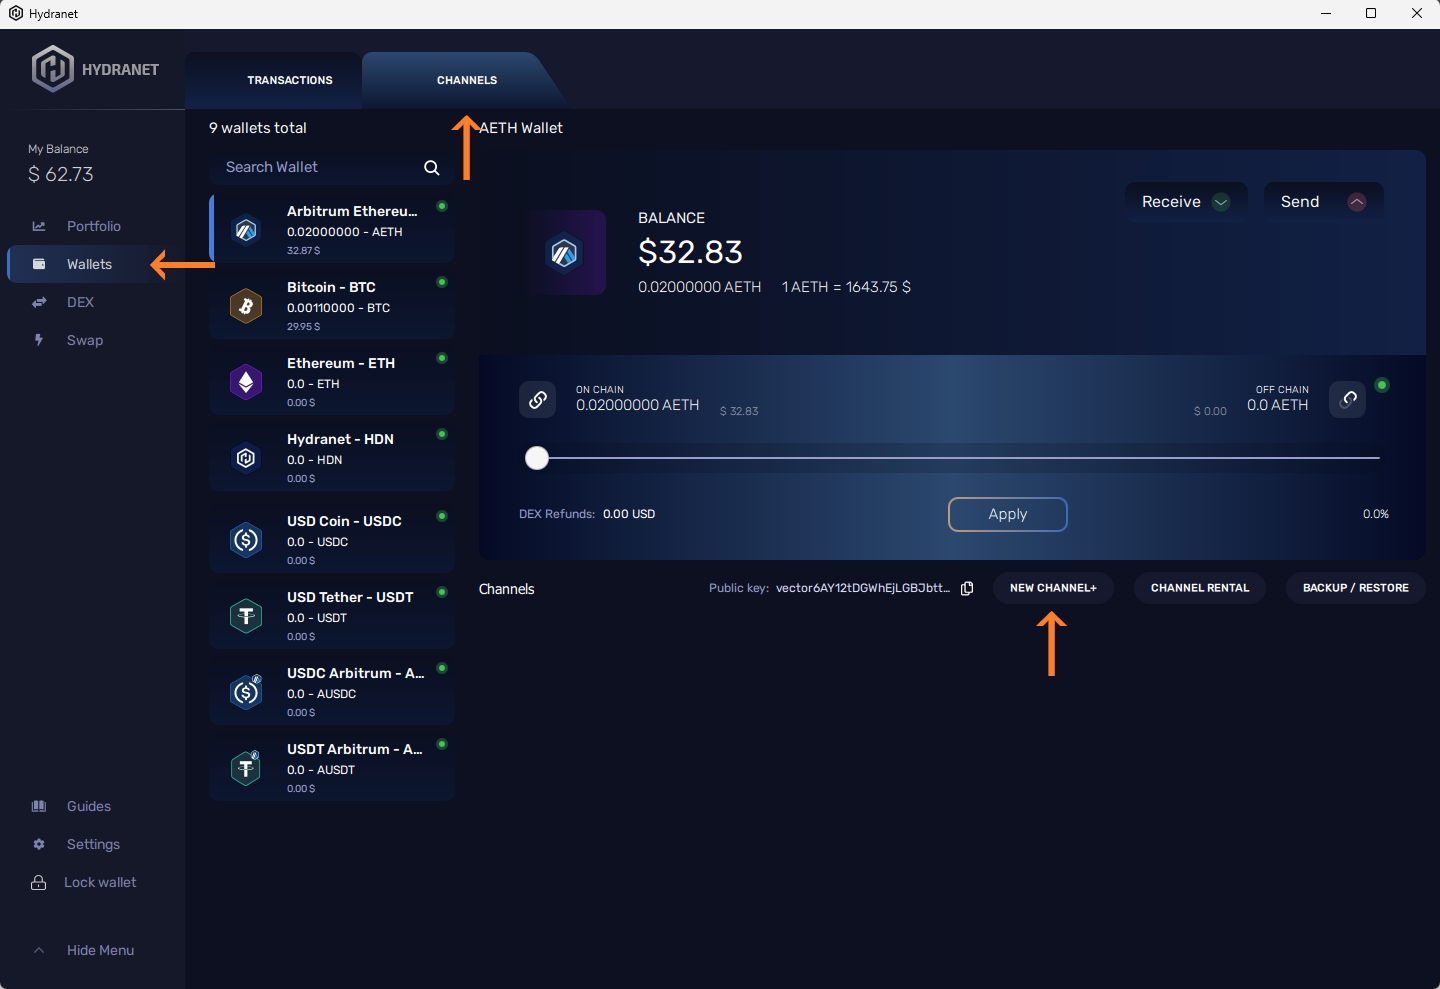
Navigate to the Wallet page and select the Channels tab at the top of the window. Select the currency you want to open a state channel for (this guide will open a Connext state channel on the Arbitrum network) and click on New Channel .
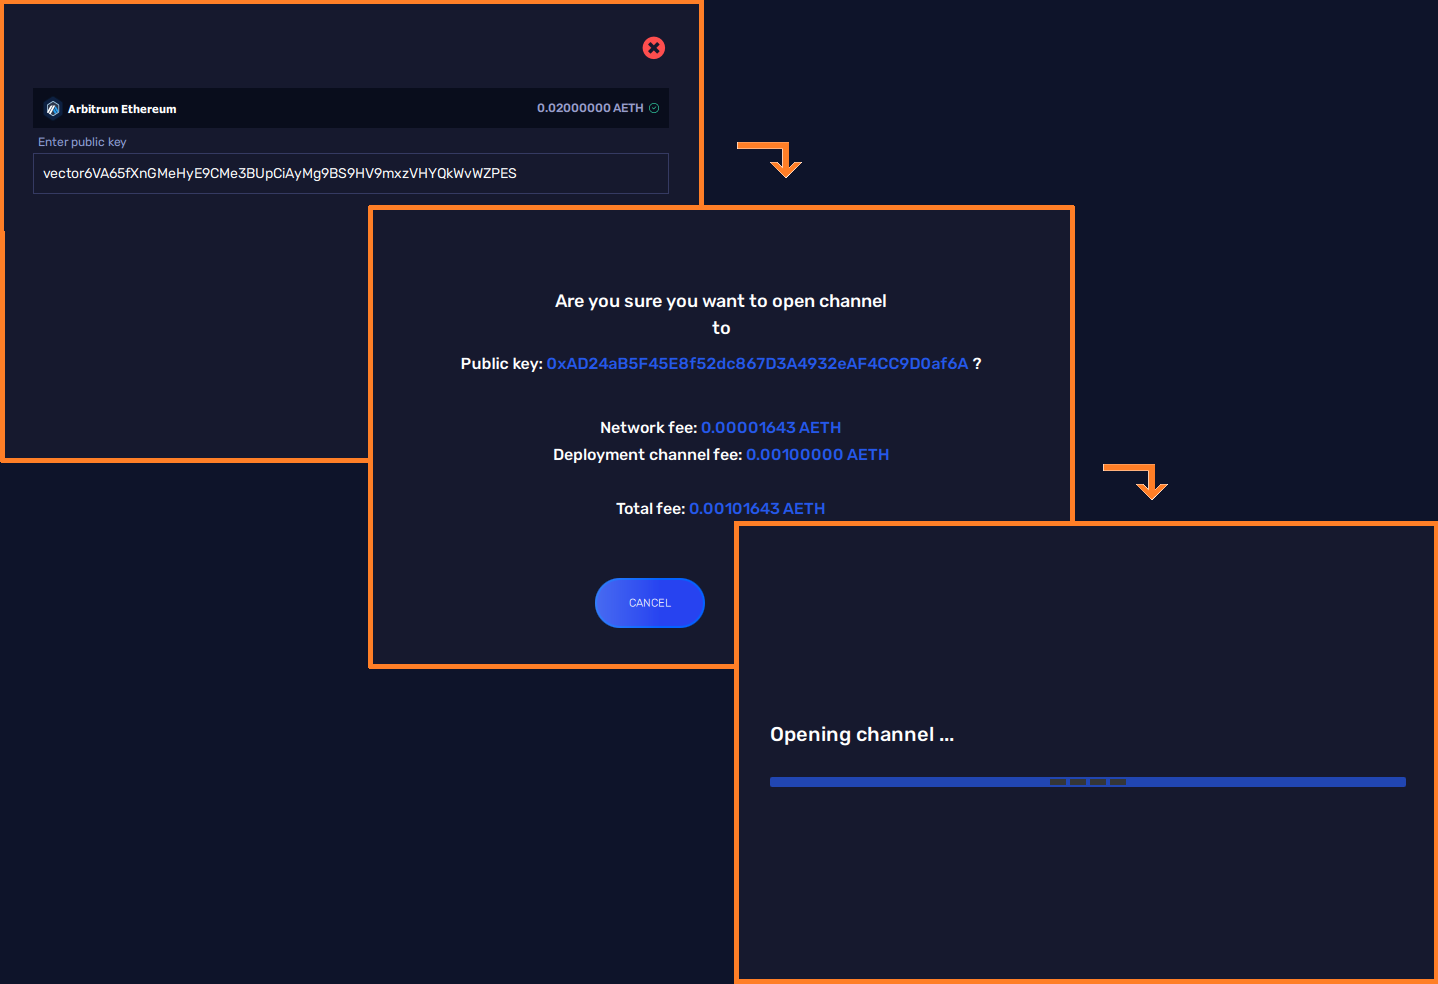
A new window will open that displays the public key to the Connext node to which you will open your Connext state channel. In this case, the node will be the Hydranet DEX hub. Proceed by clicking Open. The next window that opens will display all the fees associated with opening a Connext state channel. The total fee includes the network fee paid to network miners and a deployment fee paid to the hub. The deployment fee is a collateral payment which the hub will use in case it has to force close your state channel because of you being unresponsive and locking up the hub’s funds. Continue the process of opening your Connext state channel by clicking Confirm. The last window that opens displays that your Connext state channel is being opened.
Tip: If the “Opening channel window” does not close (takes longer than 20 minutes), restart the Hydranet DEX application by closing it and opening it again. Wait 2-3 minutes for the application to sync completely, then press “Backup/Restore” (two buttons to the right of the “New channel ” button). This will scan for your open channels and update the interface accordingly.
Manage your Connext state channel
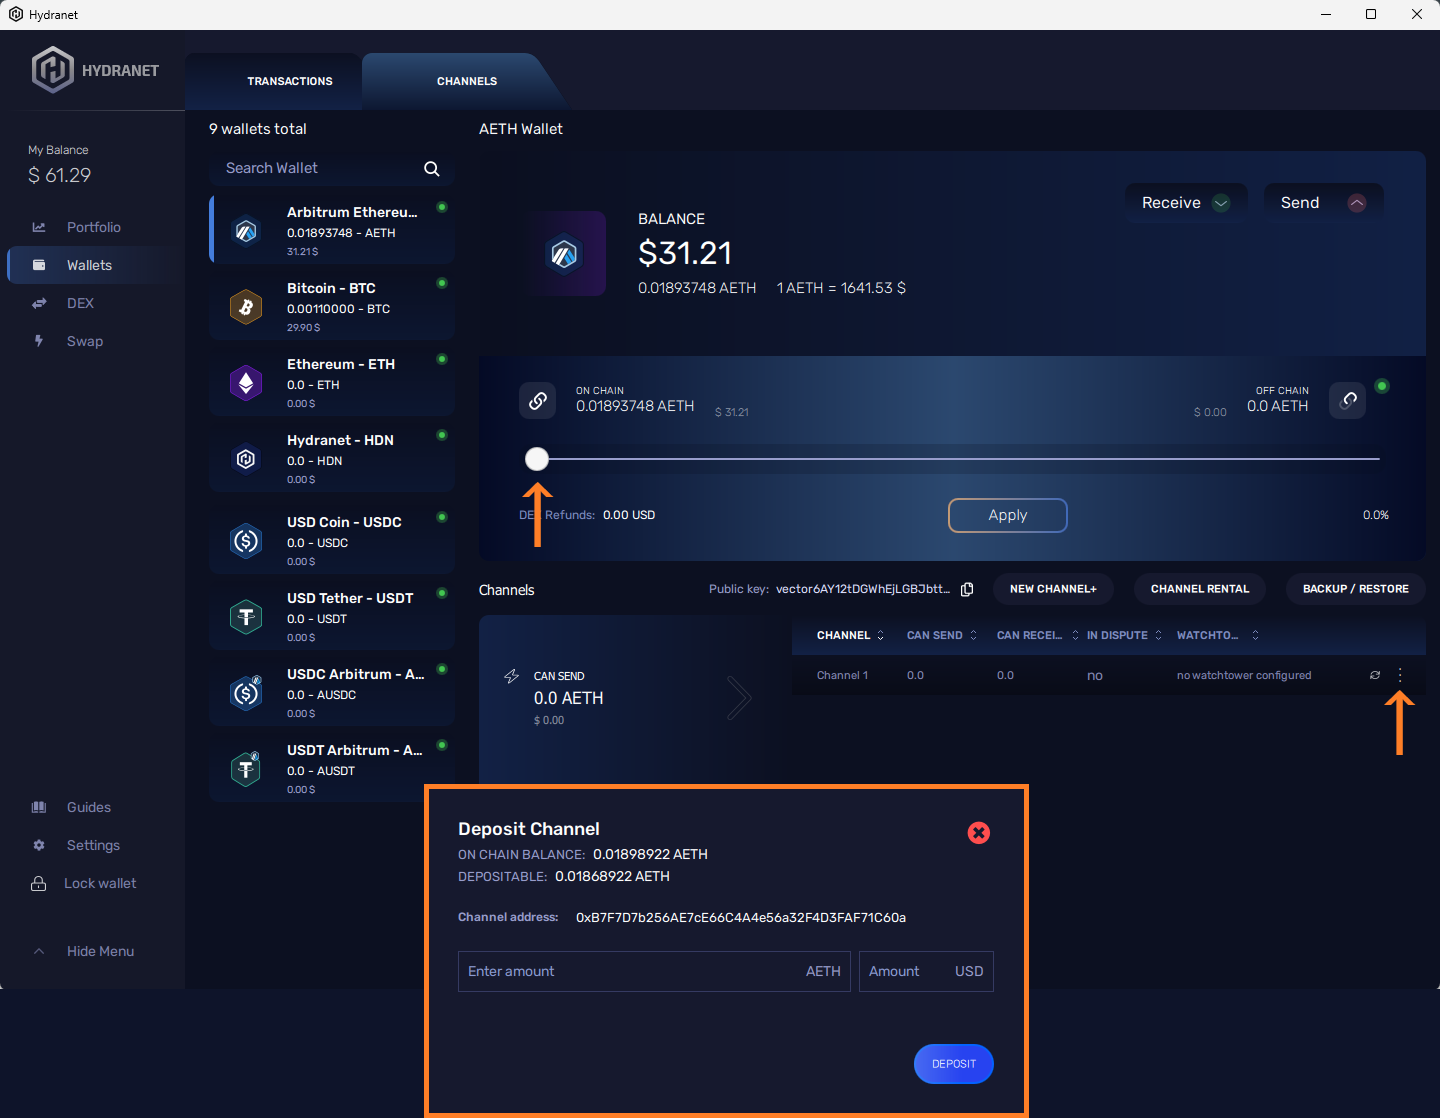
To manage your Can Send balance, click on the three dots to the far right on the state channel’s row. Select Deposit/Withdraw and enter the amount. Confirm the amount by clicking Deposit/Withdraw.
There is also a slider you can use to manage your Can Send balance. However, you can only use this slider to deposit funds to your state channel. To withdraw funds you need to go by the steps presented above.
Connext state channel liquidity rental
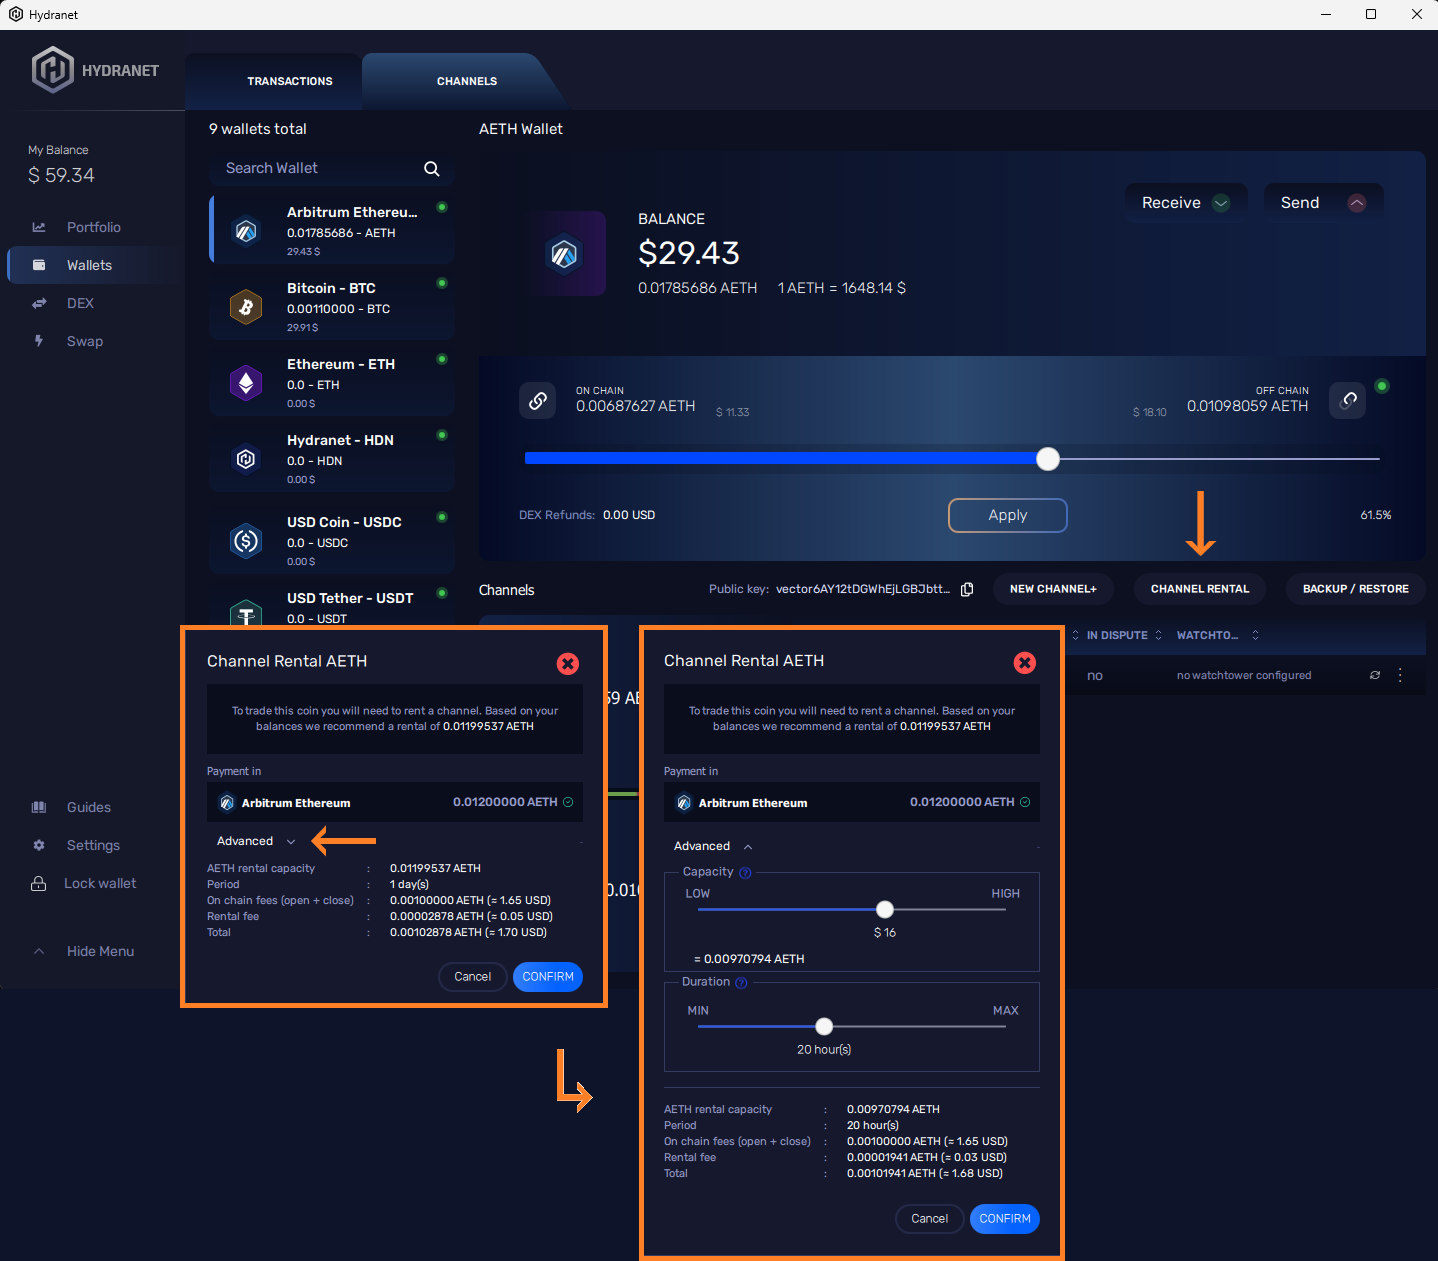
To increase your Can Receive balance, you need to rent liquidity from the hub. To do so, click on the Channel Rental button next to the New Channel button. The new window that opens will, at first, show a recommended amount of funds for you to rent. You can change this amount by clicking on the Advanced options. By using the sliders, you can specify the amount of funds you want to rent and the duration of your rental. The rental fee you pay will change accordingly. You pay the rental fee using off-chain funds. You can specify which currency you want to pay the rental fee with by clicking on the currency currently displayed under Payment in. Continue and confirm your liquidity rental by clicking Confirm.
If you encounter an error message saying that your balance is not enough (for example, “ETH balance is not enough to rent this channel”), you will need to deposit more off-chain funds in the currency you plan to use for payment of your rental.
Conclusion
Following your deposit of funds and liquidity rental, you should now be able to both send and receive funds using your Connext state channel. This is indicated by your Can Send and Can Receive balances being larger than 0.
The amount of funds used in this guide were used for illustrative purposes only. You will need to deposit and rent funds according to your specific needs. Remember, upon mainnet release of the Hydranet DEX the amount of liquidity you can rent from the hub will be limited to 100$.

Leave a Comment